
Sensor Switch WSX programming leverages advancements in smart sensors and networks‚ offering solutions for diverse applications. Recent developments focus on flexible arrays and real-time 3D visualization.
What is a Sensor Switch WSX?
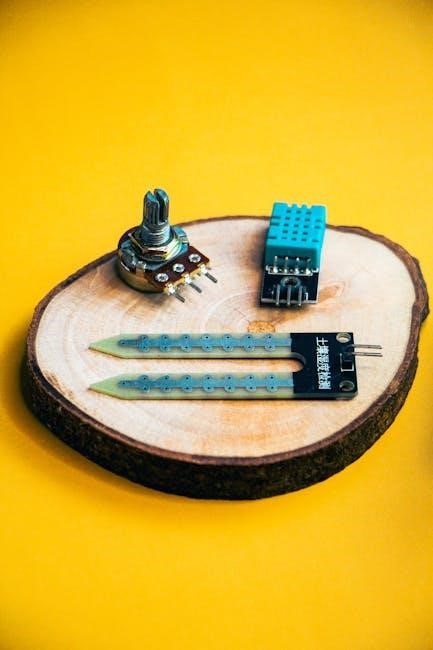
Sensor Switch WSX represents a sophisticated integration of sensor technology and switching mechanisms‚ designed for precise control and data acquisition. These devices‚ often utilized within broader sensor networks‚ translate physical stimuli – like pressure‚ temperature‚ or light – into electrical signals.
Essentially‚ a WSX unit acts as an intelligent interface‚ processing sensor data and triggering actions based on pre-programmed logic. The core functionality revolves around optoelectronic and photonic sensors‚ alongside traditional sensing principles.
Recent advancements highlight the emergence of flexible sensor arrays‚ enhancing adaptability in various applications‚ from agriculture to industrial automation. The Sensors journal emphasizes ongoing research into these evolving technologies‚ focusing on reliability even in extreme conditions.
Applications of Sensor Switch WSX
Sensor Switch WSX units find diverse applications across numerous sectors‚ driven by the rapid development of sensor technology. Agriculture benefits from precise environmental monitoring‚ optimizing crop yields through data-driven insights. Industrial automation leverages WSX for predictive maintenance and process control‚ enhancing efficiency and reducing downtime.
Furthermore‚ these switches are crucial in environmental monitoring‚ tracking pollution levels and climate changes. The increasing use of flexible sensor arrays expands applications into wearable technology and healthcare.
Research‚ as detailed in Sensors‚ highlights their role in extreme environments‚ demanding robust and reliable performance. Integration within wireless sensor networks enables large-scale data collection and analysis‚ fostering smart city initiatives and beyond.

Understanding the Core Components
WSX functionality relies on integrated sensor technology‚ switching mechanisms‚ and communication protocols. These components‚ detailed in recent Sensors publications‚ enable data acquisition and control.
Sensor Technology Used in WSX
WSX systems integrate a diverse range of sensor technologies‚ including optoelectronic and photonic sensors‚ crucial for accurate environmental and physical parameter detection. These sensors‚ as highlighted in recent research (November 24‚ 2021)‚ are pivotal in understanding technological and social change. The devices convert perceived stimuli – physical‚ chemical‚ or biological – into signals readable by electronic systems.
Smart/intelligent sensors are frequently employed‚ enabling localized data processing. Flexible sensor arrays‚ a key research area since July 23‚ 2025‚ offer adaptability for various applications. Sensor networks utilize these technologies for comprehensive monitoring‚ particularly in agriculture‚ industry‚ and environmental sensing‚ demanding robust performance even in extreme conditions.
Switching Mechanisms within WSX
WSX utilizes sophisticated switching mechanisms to respond to sensor input‚ forming the core of its functionality. These mechanisms‚ integral to sensor networks‚ enable automated control based on detected conditions. Scientific developments continually refine these processes‚ impacting technological trajectories (November 24‚ 2021). The systems are designed to handle overload‚ vibration‚ and corrosion‚ ensuring reliability.
The switching relies on interpreting signals from diverse sensors – optoelectronic‚ photonic‚ and others – converting them into actionable outputs. This process is crucial in applications ranging from industrial automation to environmental monitoring. Understanding these mechanisms is key to effective WSX programming and optimization for specific use cases.
Communication Protocols Supported
WSX’s functionality is heavily reliant on robust communication protocols‚ essential for integration within sensor networks and broader systems. These protocols facilitate data exchange between the sensor switch‚ connected devices‚ and potentially cloud-based platforms. The rapid development of sensor technology demands adaptable communication standards.
Currently‚ WSX supports a range of protocols‚ enabling seamless interaction with various sensor types and control systems. This includes standard industrial protocols alongside emerging wireless technologies. Effective programming requires understanding these protocols to ensure reliable data transmission and control‚ particularly in complex network configurations (October 31‚ 2018).

Programming Fundamentals
WSX programming necessitates understanding core concepts like data acquisition‚ processing‚ and control logic‚ alongside compatible languages and development environments for effective sensor network integration.
Programming Languages Compatible with WSX
Sensor Switch WSX supports a versatile range of programming languages‚ enabling developers to tailor solutions to specific application needs. Commonly utilized languages include C and C++‚ prized for their performance and low-level control‚ crucial for real-time data processing and efficient resource management within embedded systems. Python‚ with its readability and extensive libraries‚ is also frequently employed‚ particularly for rapid prototyping and data analysis tasks.
Furthermore‚ languages like Java and JavaScript can be integrated for developing user interfaces and network communication protocols. The choice often depends on the complexity of the application‚ the developer’s expertise‚ and the desired level of integration with existing systems. Understanding the strengths of each language is key to maximizing the potential of WSX.
Development Environments & Tools
Sensor Switch WSX programming benefits from a variety of robust development environments and tools. Integrated Development Environments (IDEs) like Eclipse and Visual Studio provide comprehensive features for coding‚ debugging‚ and project management. PlatformIO‚ a cross-platform IDE‚ is particularly popular for embedded development‚ streamlining the build process.
For data visualization‚ tools such as MATLAB and Python libraries like Matplotlib and Seaborn are invaluable. Debugging is aided by JTAG debuggers and in-circuit emulators. Version control systems like Git are essential for collaborative development. Utilizing these tools enhances efficiency and ensures code quality when working with WSX systems.
Basic Programming Concepts for Sensor Switches
Sensor Switch WSX programming relies on fundamental concepts like event-driven programming‚ where code execution is triggered by sensor data. Understanding data types – integers‚ floats‚ booleans – is crucial for handling sensor readings. Control flow statements (if-else‚ loops) enable conditional logic and repetitive tasks.
Functions promote code reusability and modularity. Interrupts allow for immediate responses to critical sensor events. Data structures‚ like arrays‚ efficiently store sensor data. Familiarity with these concepts‚ alongside an understanding of sensing principles‚ is vital for effective WSX application development and network integration.

WSX Programming Instructions ー Step-by-Step
WSX programming begins with initialization‚ followed by sensor data acquisition‚ processing‚ threshold setting‚ and finally‚ output control – enabling automated responses.
Initialization and Configuration
Initial WSX setup demands meticulous configuration of communication protocols‚ ensuring seamless data transfer within sensor networks. Begin by establishing a connection‚ verifying device addresses‚ and calibrating sensor parameters for optimal accuracy.
Crucially‚ define data acquisition rates and filtering parameters to manage data flow effectively. Consider environmental factors; extreme conditions necessitate robust configuration settings.
Proper initialization minimizes errors and maximizes performance. Thoroughly test configurations before deployment‚ utilizing available debugging tools. Remember to document all settings for future reference and maintenance‚ especially when integrating with 3D visualization systems.
Sensor Data Acquisition
Acquiring data from the WSX involves utilizing compatible programming languages to interface with the sensor technology. Implement routines to regularly poll sensor values‚ handling potential communication errors gracefully. Consider the sensor’s operating environment; extreme conditions may impact data quality.
Efficient data acquisition requires optimizing polling rates to balance responsiveness and resource consumption. Leverage the WSX’s supported communication protocols for reliable data transfer.
Ensure data is timestamped for accurate analysis and visualization‚ particularly when integrating with real-time 3D systems. Prioritize robust error handling to maintain data integrity within sensor networks.
Data Processing and Filtering
Processing raw sensor data from the WSX is crucial for accurate analysis. Implement filtering techniques – such as moving averages or Kalman filters – to reduce noise and improve signal clarity‚ especially in harsh environments. Account for potential sensor drift or calibration issues.
Data normalization can enhance comparability across different sensors within a network. Consider utilizing algorithms to detect and handle outliers‚ ensuring data integrity.
Efficient processing minimizes latency‚ vital for real-time applications and 3D visualization. Optimize code for performance‚ particularly when dealing with large sensor arrays and complex logic.
Setting Thresholds and Trigger Conditions
Defining precise thresholds is fundamental to WSX programming‚ enabling automated responses to sensor data. Establish upper and lower bounds for each sensor parameter‚ considering potential environmental variations and sensor limitations. Implement hysteresis to prevent rapid‚ unstable switching.
Trigger conditions can be simple (exceeding a threshold) or complex‚ involving multiple sensors and logical operators. Utilize these conditions to initiate specific actions‚ like activating alerts or controlling output devices.
Careful calibration and testing are essential to ensure thresholds accurately reflect desired operational parameters‚ especially in extreme conditions.
Output Control and Actuation
WSX programming allows precise control over connected actuators based on sensor data and defined trigger conditions. This includes digital outputs (on/off signals)‚ analog outputs (variable voltage/current)‚ and communication protocols for networked devices.
Implement safety mechanisms to prevent unintended actuation‚ such as interlocks and fail-safe defaults. Consider response times and potential delays in the actuation process.
Thorough testing is crucial to verify correct output behavior under various scenarios‚ particularly in harsh environments where sensor reliability may be affected. Optimize code for efficient and reliable actuation.
Advanced Programming Techniques
WSX programming benefits from complex logic‚ robust error handling‚ and code optimization for performance‚ especially within sensor networks and extreme environments.
Implementing Complex Logic
Sensor Switch WSX programming often requires moving beyond simple threshold-based triggers to incorporate intricate decision-making processes. This involves utilizing conditional statements‚ loops‚ and potentially state machines to manage sensor interactions and output control. Consider scenarios demanding sequential operations – for example‚ activating one actuator only after another has completed a task‚ or adjusting parameters based on multiple sensor readings converging on specific criteria.
Furthermore‚ implementing fuzzy logic or rule-based systems can enhance responsiveness to nuanced environmental changes. Leveraging these techniques allows the WSX to adapt intelligently‚ mirroring real-world complexities and improving overall system efficiency. The integration of these advanced logical structures is crucial for applications in dynamic and unpredictable settings.
Error Handling and Debugging
Sensor Switch WSX programming necessitates robust error handling to ensure reliable operation‚ particularly in extreme environments where sensor failures are more probable. Implement comprehensive checks for invalid sensor data‚ communication errors‚ and unexpected system states. Utilize logging mechanisms to record events and facilitate post-mortem analysis of issues.
Debugging WSX code often requires specialized tools and techniques. Employ breakpoints‚ step-through execution‚ and variable inspection within your development environment. Consider simulating sensor inputs to isolate problems. Thorough testing‚ including edge-case scenarios‚ is vital. Remember that scientific developments in sensors continually evolve‚ demanding adaptable debugging strategies.
Optimizing Code for Performance
Sensor Switch WSX programming demands efficient code‚ especially when dealing with real-time data processing and complex logic within sensor networks. Minimize computational overhead by utilizing optimized algorithms and data structures. Reduce unnecessary memory allocations and deallocations. Leverage the capabilities of the chosen programming language and development environment.
Consider the impact of code on power consumption‚ crucial for wireless sensor deployments. Prioritize code clarity and maintainability alongside performance. Regularly profile your code to identify bottlenecks and areas for improvement. The integration of AI in sensor switch control necessitates further optimization for complex calculations.

Real-Time Data Visualization
WSX programming benefits from novel 3D visualization systems‚ enhancing understanding of sensor data streams and enabling effective monitoring of network performance.
Integrating with 3D Visualization Systems
WSX programming gains significant power when coupled with 3D visualization tools. These systems move beyond traditional charts‚ offering immersive representations of sensor data within a spatial context. This is particularly crucial for complex sensor networks and environments where data relationships are not immediately apparent.
Integrating involves mapping sensor outputs to 3D coordinates‚ allowing users to intuitively grasp data distributions and identify anomalies. Recent research emphasizes real-time capabilities‚ ensuring visualizations dynamically reflect changing sensor conditions. Furthermore‚ these systems often support interactive exploration‚ enabling users to zoom‚ rotate‚ and filter data for detailed analysis. Successful integration requires careful consideration of data formats and communication protocols between the WSX and the visualization platform.
Sensor Data Visualization Methods
WSX programming benefits from diverse visualization techniques beyond simple graphs. Traditional methods include line charts for time-series data and scatter plots for correlating multiple sensors. However‚ more advanced approaches are gaining traction‚ driven by the need to interpret complex datasets. Heatmaps effectively display data density and spatial patterns‚ while contour plots reveal gradients and thresholds.
Recent advancements focus on real-time 3D visualizations‚ offering immersive data representation. Color-coding sensor values enhances interpretability‚ and interactive dashboards allow users to filter and explore data dynamically. Choosing the appropriate method depends on the specific application and the type of insights desired from the WSX sensor network.

Sensor Networks and WSX Integration
WSX seamlessly integrates into wireless sensor networks‚ addressing challenges like data transmission and network topology. Research emphasizes robust communication and efficient data handling.
WSX in Wireless Sensor Networks
Integrating Sensor Switch WSX into wireless sensor networks (WSNs) unlocks powerful capabilities for diverse applications‚ from precision agriculture to industrial automation. WSX’s programmability allows for customized data acquisition and processing directly at the sensor node‚ reducing bandwidth requirements and latency.
Current research highlights the importance of addressing challenges inherent in WSNs‚ such as energy efficiency‚ network scalability‚ and data security. WSX’s optimized code execution and support for various communication protocols contribute to extending network lifetime. Furthermore‚ its adaptability facilitates the creation of robust and resilient sensor networks capable of operating in complex environments. The development of flexible sensor arrays further enhances the potential of WSX within these networks.
Addressing Challenges in Sensor Networks
Sensor network deployment faces hurdles like limited energy‚ data security‚ and reliable communication. WSX programming aids in mitigating these issues through optimized code and efficient data handling. Energy conservation is achieved via intelligent sensor duty cycling and reduced data transmission.
Security protocols can be implemented within WSX firmware to protect sensitive data. Furthermore‚ robust error handling and debugging tools‚ integral to WSX programming‚ ensure network stability even in harsh conditions. Scientific advancements in sensor technology continually refine these solutions‚ and WSX’s adaptability allows it to integrate these improvements‚ fostering resilient and secure networks.

Extreme Environment Considerations
WSX programming must account for overload‚ vibration‚ corrosion‚ and pressure in harsh settings‚ ensuring sensor reliability through robust code and data validation.
WSX Operation in Harsh Conditions
Programming WSX for extreme environments demands meticulous attention to detail. Code must compensate for temperature fluctuations impacting sensor accuracy and communication stability. Robust error handling is crucial‚ anticipating signal degradation due to corrosion or physical stress.
Data filtering algorithms should mitigate noise introduced by vibration or electromagnetic interference. Consider implementing redundant sensor readings and employing advanced calibration techniques. Power management strategies are vital in remote locations with limited energy resources.
Furthermore‚ the WSX software should incorporate self-diagnostic routines to detect and report component failures promptly. Prioritize utilizing materials and coding practices designed for longevity and resilience in challenging operational landscapes.
Sensor Reliability in Extreme Environments
WSX programming must prioritize sensor reliability when deployed in harsh conditions. Implement continuous monitoring of sensor health‚ tracking parameters like signal strength and response time. Utilize data validation techniques to identify and discard erroneous readings caused by environmental factors like overload or pressure.
Employ predictive maintenance algorithms based on historical data to anticipate potential failures. Code should incorporate fail-safe mechanisms‚ ensuring continued operation even with partial sensor degradation.
Regular calibration routines‚ adjusted for temperature and humidity‚ are essential. Consider sensor redundancy‚ utilizing multiple sensors to cross-validate data and improve overall system robustness. Thorough testing under simulated extreme conditions is paramount before deployment.

Future Trends in Sensor Switch Programming
WSX programming will increasingly integrate AI for intelligent control‚ alongside flexible sensor arrays‚ enhancing adaptability and performance in complex‚ dynamic environments.
Flexible Sensor Arrays and WSX
WSX programming is poised to benefit significantly from the rapid evolution of flexible sensor technology. These arrays‚ characterized by exceptional flexibility and wearability‚ are becoming key components in diverse applications. Integrating these sensors with WSX allows for dynamic data acquisition from previously inaccessible areas or surfaces.
The ability to conform to non-planar geometries opens new possibilities for monitoring complex systems. Programming considerations include managing the increased data streams from numerous sensors and adapting algorithms to account for sensor placement and potential distortions. Furthermore‚ advancements in materials science are driving improvements in sensor reliability and longevity‚ crucial for long-term deployments within WSX-controlled systems.
The Role of AI in Sensor Switch Control
WSX programming is increasingly incorporating Artificial Intelligence (AI) to enhance sensor switch control. AI algorithms can analyze complex sensor data patterns‚ predicting potential failures or optimizing performance beyond traditional threshold-based systems. This allows for proactive adjustments and minimizes downtime in critical applications.
Machine learning models can be trained to identify anomalies‚ filter noise‚ and adapt to changing environmental conditions. Integrating AI requires careful consideration of computational resources and real-time processing constraints within the WSX environment. Furthermore‚ explainable AI (XAI) is becoming vital‚ providing insights into the decision-making process of the AI controller for improved trust and reliability.

Resources and Support
Comprehensive WSX programming support includes online documentation‚ community forums‚ and MDPI’s Sensors journal‚ offering tutorials and peer-reviewed articles for developers.
Online Documentation and Tutorials
Extensive online resources are crucial for mastering Sensor Switch WSX programming. MDPI’s Sensors journal frequently publishes Special Issues dedicated to sensor technologies‚ providing cutting-edge research and practical insights. Developers can access detailed documentation covering initialization‚ data acquisition‚ and output control.
Tutorials‚ often community-driven‚ demonstrate implementing complex logic and debugging techniques. These resources address challenges in sensor networks‚ including wireless communication and data visualization. Furthermore‚ documentation explains WSX operation in extreme environments‚ focusing on sensor reliability and error handling. The availability of these materials accelerates the learning curve and fosters innovation within the WSX programming ecosystem.
Community Forums and Support Channels
Active community forums are vital for Sensor Switch WSX programmers‚ offering a platform for collaborative problem-solving and knowledge sharing. These channels facilitate discussions on advanced programming techniques‚ error handling‚ and optimization strategies. Users can find solutions to common challenges and contribute to the collective understanding of WSX functionalities.
Support channels‚ often hosted by MDPI alongside the Sensors journal‚ provide direct access to experts and experienced developers. These resources address specific implementation questions and offer guidance on integrating WSX into sensor networks. Engaging with the community accelerates learning and fosters innovation in this rapidly evolving field.