Cross stitch patterns in PDF format offer a convenient and accessible way to explore embroidery designs. These digital files provide detailed charts, color guides, and instructions for stitching. Perfect for crafters of all skill levels, PDF patterns are easily downloadable and printable, making them a popular choice for modern embroiderers. They allow for customization and flexibility, ensuring a personalized touch in every project. Whether you’re a beginner or an experienced stitcher, PDF cross stitch patterns are a versatile and eco-friendly way to create beautiful embroidery pieces.
Types of Cross Stitch Patterns Available in PDF
Cross stitch patterns in PDF format come in various types, including free and paid designs. Free patterns are ideal for beginners, while paid ones offer intricate details and themes.
2.1 Free Cross Stitch Patterns
Free cross stitch patterns in PDF format are a popular choice for crafters, offering a budget-friendly way to explore various designs. These patterns are widely available online, with platforms like LoveCrafts and Fat Quarter Shop providing a wide range of downloadable options. Many designers offer free PDF patterns as a way to introduce their work or celebrate special occasions, such as holidays or new collections. Free patterns often feature simple yet charming designs, making them ideal for beginners or those looking to practice new techniques. They typically include basic instructions and color charts, ensuring ease of use. Whether you’re stitching a small motif or a larger project, free cross stitch PDFs are a great way to get creative without spending money. They also allow crafters to experiment with different themes and styles before committing to paid designs.
2.2 Paid Cross Stitch Patterns
Paid cross stitch patterns in PDF format offer a wide range of unique and intricate designs, often created by professional designers. These patterns are available for purchase on platforms like Etsy, craft stores, and designer websites. They typically include high-quality images, detailed charts, and clear instructions, making them ideal for crafters seeking complex or specialized designs. Paid patterns often feature exclusive themes, such as seasonal motifs, animals, or fantasy-inspired artwork, catering to diverse interests. Many include additional features like color guides, material lists, and stitching tips. While free patterns are great for beginners, paid options provide premium quality and originality, making them a worthwhile investment for serious stitchers. They also support independent designers and contribute to the growth of the cross stitch community. Paid PDF patterns are a great choice for those looking for unique and high-quality designs to enhance their stitching projects.
Materials Needed for Cross Stitch Projects
Essential materials include Aida or evenweave fabric, embroidery hoops, DMC threads, and sharp tapestry needles. These tools ensure precise stitching and vibrant results for any cross stitch design.
3.1 Fabric Selection
Fabric selection is crucial for cross stitch projects, with Aida, evenweave linen, and jobelan being popular choices. Aida cloth is ideal for beginners due to its sturdy texture and visible holes, while evenweave linen offers a softer, more natural look. Jobelan, a linen-cotton blend, provides durability and a smooth stitching surface. The fabric’s thread count and weave affect stitch visibility and ease. For PDF patterns, choosing the right fabric ensures accurate stitch placement and a professional finish. Always pre-wash fabric to remove sizing and prevent shrinkage. Consider the project’s size and detail level when selecting fabric type and count. Proper fabric selection enhances the stitching experience and guarantees a beautiful, long-lasting design. It’s essential to match the fabric to the pattern’s recommendations for optimal results.
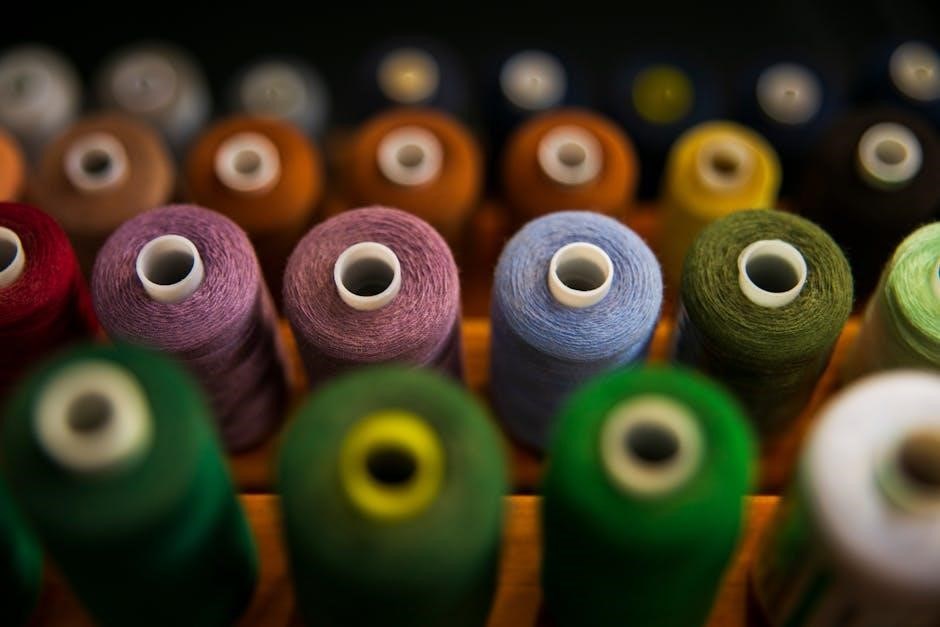
3.2 Thread and Color Choices
Thread and color selection are vital components of cross stitch projects, as they determine the visual appeal and accuracy of the design. DMC and other embroidery thread brands are widely used, offering a vast spectrum of colors. PDF patterns typically include detailed color charts, specifying the exact shades and thread types required. This ensures consistency and helps stitchers achieve the intended design. Many patterns allow for customization, enabling stitchers to choose alternative colors to match personal preferences or fabric choices. Factors like fabric type and project size also influence thread selection, with some threads offering metallic or glitter effects for added embellishment. Proper thread and color choices enhance the stitching experience and ensure a beautiful, professional-looking finished piece. Always refer to the pattern’s guidelines for optimal results.
3.3 Essential Tools
To successfully complete a cross stitch project, having the right tools is essential. A sturdy embroidery hoop or frame is necessary to keep the fabric taut, ensuring even stitching. A tapestry needle, with its blunt tip and large eye, is ideal for threading embroidery floss. Scissors are crucial for cutting threads accurately, and a small pair is recommended for precision. A needle threader can be helpful for managing fine threads. Fabric cutters or embroidery scissors with a curved blade are useful for trimming excess fabric. Optional tools include stitch markers for tracking progress and magnifying lamps for better visibility. Using high-quality tools enhances the stitching experience, making it more enjoyable and efficient. These basics ensure that your cross stitch project turns out neatly and professionally, whether you’re working on a simple or complex design.

Benefits of Using PDF Cross Stitch Patterns
Using PDF cross stitch patterns offers numerous advantages for crafters. They are instantly downloadable, eliminating the need for physical storage and allowing access to a wide variety of designs. PDF patterns are cost-effective, with many free options available, making them accessible to everyone. They also provide the flexibility to print only the necessary sections, reducing paper waste. Additionally, PDFs can be easily shared and stored digitally, ensuring they are always within reach. The ability to zoom in on intricate details enhances visibility, making stitching more precise. Furthermore, PDF patterns enable customization, such as adjusting colors or resizing designs. This format also supports sustainability by reducing the need for physical materials. Overall, PDF cross stitch patterns are a convenient, versatile, and eco-friendly choice for embroiderers, offering unparalleled flexibility and accessibility for crafting projects.
How to Use Cross Stitch Patterns PDF
Using cross stitch patterns in PDF format is straightforward and convenient. Start by downloading the PDF file, which typically includes a chart, color guide, and instructions. Review the pattern to understand the symbols, thread colors, and fabric requirements. Print the pattern or view it digitally while stitching. Choose your fabric, such as Aida or Evenweave, and select the appropriate embroidery hoop size. Thread your needle with the specified embroidery floss, matching the colors from the chart. Begin stitching by locating the center of the design, often marked on the pattern, and work outward. Follow the symbols to create the desired image. For intricate details, zoom in on the digital file or enlarge the printed chart. Adjust the pattern size if needed using stitching software. This method ensures precision and ease, making PDF patterns a practical choice for cross stitch enthusiasts.
Popular Themes and Designs in Cross Stitch PDFs
Cross stitch PDFs offer a diverse array of popular themes that cater to various interests. Animal lovers often enjoy patterns like the “Bird Zoey cross stitch pattern,” showcasing colorful birds. Nature enthusiasts might prefer designs such as “Coastal Red,” featuring serene coastal elements. Seasonal themes are also prevalent, with patterns like “Happy St. Patrick’s Day Cross Stitch” celebrating specific holidays. Fantasy creatures, such as the “Honeytail Fae Dragon,” attract those who love mythical beings. Additionally, many designers provide customizable and unique designs, allowing stitchers to personalize their projects. The availability of both free and paid patterns, as seen with “Subversive Cross Stitch” offering free PDFs, makes these themes accessible to everyone. This variety ensures that there’s something for every skill level and interest, making cross stitch PDFs a versatile choice for crafters.
Customizing Your Cross Stitch Patterns
Customizing cross stitch patterns is a great way to add a personal touch to your projects. With PDF files, you can easily adjust colors, fabric types, and even incorporate personal elements like names or dates. For instance, you can choose embroidery thread colors that match your home decor or favorite hues. Additionally, you can modify the pattern size or complexity to suit your skill level. Some crafters also enjoy adding unique symbols or motifs to make their designs truly one-of-a-kind. The flexibility of PDF patterns allows for experimentation without compromising the original design. Whether you’re stitching for a gift or personal enjoyment, customization ensures your finished piece is meaningful and tailored to your preferences. This feature makes cross stitch PDFs a versatile and creative medium for crafters of all levels.
Where to Find High-Quality Cross Stitch Patterns PDF
High-quality cross stitch patterns in PDF format can be found through various online platforms and craft stores. Specialty embroidery shops like Embroidery Central and Stitchery.com offer a wide range of digital patterns catering to both beginners and advanced stitchers. Independent designers on Etsy provide unique and personalized designs, supporting smaller creators. Additionally, subscription services such as Craftsy and Creativebug offer access to extensive libraries of patterns. Some designers share free PDF patterns on their blogs or websites, making it worthwhile to explore reputable cross stitching communities for these hidden gems. By visiting these platforms, comparing offerings, and reading reviews, crafters can find clear, well-designed patterns suitable for their skill level and project needs, ensuring a successful and enjoyable stitching experience.
Common Mistakes to Avoid When Using PDF Patterns
When working with cross stitch patterns in PDF format, there are several common mistakes to avoid for a successful project. One major error is not reading the instructions carefully before starting, which can lead to confusion and wasted materials. Another mistake is ignoring the recommended fabric type or thread colors, as this can significantly affect the final result. Additionally, some stitchers fail to center their design properly on the fabric, leading to misalignment. It’s also important to avoid skipping the step of counting threads or stitches, as this can result in an incomplete or mismatched design. Lastly, not checking the PDF for clarity or completeness before printing can cause unnecessary delays or frustrations. By being mindful of these pitfalls, crafters can ensure a smooth and enjoyable stitching experience with their PDF patterns.
Troubleshooting Tips for Cross Stitch Beginners
When starting with cross stitch, beginners often encounter challenges that can be easily resolved with the right guidance. One common issue is miscounting stitches, which can throw off the entire design. To avoid this, use a needle threader and work in small sections, marking your place on the PDF pattern. Another mistake is using the wrong fabric type or thread, which can lead to uneven stitching. Ensure you select the recommended materials for your project. Additionally, tension issues can cause fabric to pucker; try to maintain consistent stitching pressure. If threads fray excessively, consider using a thread conditioner. Lastly, don’t overlook the importance of proper hoop or frame use to keep fabric taut. By addressing these issues early, beginners can achieve professional-looking results and enjoy a smoother stitching experience with their PDF patterns.

Creating Your Own Cross Stitch Patterns
Designing custom cross stitch patterns allows for endless creativity and personalization. To get started, use graphic design software or specialized cross-stitch tools to convert images or ideas into stitchable grids. Consider the fabric type, thread colors, and project size when crafting your design. Ensure the pattern is clear and easy to follow, with proper color coding and symbols. For beginners, simple designs with fewer colors are recommended. Once satisfied, save the pattern as a PDF for easy sharing or printing. Custom patterns enable you to tailor projects to personal preferences or gifts, making each piece truly unique. With practice, you can master the art of creating intricate and meaningful cross stitch designs from scratch.

The Future of Cross Stitch PDF Patterns
The future of cross stitch PDF patterns is promising, with digital innovation driving accessibility and creativity. As embroidery software advances, designing and sharing custom patterns will become even more streamlined. Expect enhanced interactivity, such as adjustable color palettes and real-time previews, to simplify the stitching process. Additionally, eco-friendly practices will grow, as PDFs reduce the need for physical materials. The rise of online communities will foster collaboration, enabling creators to share and inspire global audiences. With more tools for customization, cross stitch will continue to evolve, blending traditional techniques with modern technology. This digital revolution ensures that cross stitch remains a vibrant and adaptable craft, appealing to new generations while honoring its timeless charm.