
The Cochlear Mini Mic 2 Manual provides comprehensive guidance for users to understand and utilize the device effectively. It covers features, setup, and troubleshooting, ensuring optimal performance.
1.1 Overview of the Cochlear Mini Mic 2
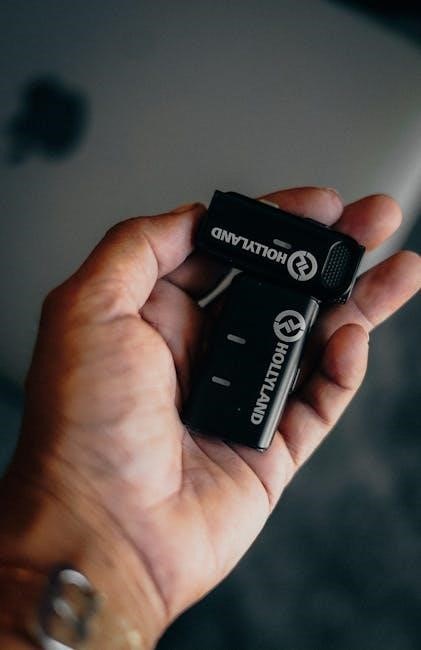
The Cochlear Mini Mic 2 is a remote microphone designed to enhance hearing experiences in various environments. It offers wireless connectivity, long battery life, and a compact design for portability. This manual guides users through setup, operation, and troubleshooting, ensuring optimal use of the device for improved communication and audio clarity in everyday situations.
1.2 Importance of the User Manual
The user manual is essential for understanding the Cochlear Mini Mic 2’s features, operation, and troubleshooting. It provides detailed instructions for setup, pairing, and maintenance, ensuring optimal performance. The manual also includes safety information and warranty details, making it a crucial resource for users to maximize their experience with the device effectively.

Key Features of the Cochlear Mini Mic 2
The Cochlear Mini Mic 2 offers wireless connectivity, long battery life, and a compact, portable design, making it easy to use and adaptable to various settings.
2.1 Wireless Connectivity
The Cochlear Mini Mic 2 features wireless connectivity, enabling seamless audio streaming to Cochlear sound processors. This technology enhances communication in various environments by eliminating cables. It supports automatic pairing with pre-paired devices and allows manual pairing for multiple devices, ensuring convenience and flexibility. The wireless connection provides a stable and high-quality audio experience, making it ideal for both personal and professional use.
2.2 Long Battery Life
The Cochlear Mini Mic 2 is designed with a long-lasting battery, offering extended use on a single charge. It supports up to a full day of continuous streaming, ensuring reliability in various settings. The device can be charged via a Micro-USB cable, providing convenient and efficient power replenishment. This feature enhances user experience by minimizing interruptions and ensuring consistent performance throughout the day.
2.3 Compact and Portable Design
The Cochlear Mini Mic 2 features a lightweight and compact design, making it easy to carry and use in various settings. Its portable nature allows for seamless placement on tables or clothing, ensuring optimal audio capture. The ergonomic design enhances user comfort and convenience, making it ideal for both personal and professional environments. This portability ensures it remains discreet and practical for everyday use.
How to Turn On/Off the Cochlear Mini Mic 2
To turn on the Cochlear Mini Mic 2, press and hold the ON/OFF button until the status LED turns green. To turn it off, press and hold the same button until the LED turns red. Ensure the sound processor is off before turning on the microphone for proper activation.
3.1 Step-by-Step Activation Process
To activate the Cochlear Mini Mic 2, press and hold the ON/OFF button until the status LED turns green. Ensure the sound processor is off before turning on the microphone. Once activated, the microphone automatically pairs with the sound processor within 20 seconds. If pairing doesn’t occur, repeat the process or refer to the manual for troubleshooting.
3.2 Understanding the Status LED Indicators
The Cochlear Mini Mic 2 features status LED indicators to provide visual feedback. A green LED indicates the microphone is on and paired with the sound processor. A red LED signals low battery or an error. Flashing green indicates pairing mode, while flashing red may indicate charging or connectivity issues. Refer to the manual for detailed LED status interpretations.

Charging the Cochlear Mini Mic 2
The Cochlear Mini Mic 2 is charged using a Micro-USB cable. Connect it to a power source, and the status LED will turn red while charging.
4.1 Charging Methods and Requirements
The Cochlear Mini Mic 2 charges via a Micro-USB cable. Plug the cable into the device and connect to a power source. The status LED turns red during charging. Use the provided cable for optimal performance. Avoid using damaged cables to prevent damage. Charging typically takes 2-3 hours for full battery life. Ensure the device is powered off during charging for efficient charging.
4.2 Charging Time and Battery Life Expectancy
The Cochlear Mini Mic 2 typically charges in 2-3 hours via the Micro-USB cable. A full charge provides up to 10 hours of continuous use. Battery life may vary depending on usage and settings. Avoid overcharging to maintain battery health. The status LED turns green when fully charged. Regular charging ensures optimal performance and longevity of the device.

Pairing the Cochlear Mini Mic 2 with Sound Processors
The Mini Mic 2 pairs automatically with sound processors within 20 seconds. For manual pairing, press the pairing button once (twice for channel 2).
5.1 Automatic Pairing Process
The automatic pairing process is straightforward. Turn off your sound processor, then turn on the Mini Mic 2. The device will automatically pair within 20 seconds. The status LED will turn green once connected. Previously paired processors do not require re-pairing. This seamless process ensures quick and efficient connectivity, enhancing your experience with minimal effort.
5.2 Manual Pairing for Multiple Devices
For manual pairing with multiple devices, press the pairing button on the Mini Mic 2 once (twice for channel 2, three times for channel 3). Turn off your sound processor, then turn it on again. The LED will flash blue during pairing and turn green when connected. This process allows seamless switching between multiple sound processors, ensuring versatility in different listening environments.
Using the Cochlear Mini Mic 2 in Different Settings
The Cochlear Mini Mic 2 enhances hearing in various environments, from noisy spaces to group settings, providing clear audio streaming and adaptability for diverse listening needs.
6.1 Optimal Use in Noisy Environments
For optimal performance in noisy settings, position the Mini Mic 2 closer to the speaker and away from background noise. Use the lanyard to secure it and ensure stable audio capture. Adjust the sound processor settings to enhance clarity and reduce ambient interference, making conversations clearer in environments like restaurants or classrooms.
6.2 Best Practices for Group Settings
In group settings, place the Mini Mic 2 on a table or pass it to the speaker for clear audio capture. Ensure the microphone is positioned to face the speaker and away from noise sources. Activate streaming on your sound processor and adjust settings to prioritize the microphone’s signal. This enhances clarity and ensures you hear the speaker distinctly, even in dynamic group environments.
Troubleshooting Common Issues
Common issues include connectivity problems and audio interference. Restart the Mini Mic 2, check the LED status, and ensure proper pairing. Consult the manual for detailed solutions.
7.1 Resolving Connectivity Problems
To resolve connectivity issues with the Mini Mic 2, restart the device and ensure it is properly paired with your sound processor. If problems persist, check the LED status for pairing confirmation. Refer to the manual for detailed steps on resetting the device or re-pairing. Ensure your sound processor is updated and within range for optimal connection.

7.2 Addressing Audio Quality Concerns
If experiencing poor audio quality, ensure the Mini Mic 2 is positioned correctly and away from noise sources. Check for interference from nearby devices. Clean the microphone regularly to maintain clarity. If issues persist, reset the device or update firmware as per the manual. Ensure stable connectivity and optimal battery levels for consistent audio performance;
Maintenance and Care Tips
Regularly clean the microphone with a soft cloth and avoid exposure to moisture. Store the device in a protective case when not in use to prevent damage.
8.1 Cleaning the Microphone
To maintain optimal performance, clean the microphone regularly using a dry, soft cloth. For stubborn marks, lightly dampen the cloth with water, but avoid liquids. Gently wipe the grille and surface, ensuring no moisture enters the device. Avoid harsh chemicals or abrasive materials. Regular cleaning prevents dust buildup and ensures clear audio transmission. Store the microphone in a dry place to prevent damage.
8.2 Storage and Handling Precautions
Store the Cochlear Mini Mic 2 in a dry, cool place, away from direct sunlight and moisture. Use the provided case to protect it during transport. Avoid exposing the device to extreme temperatures or physical stress. Handle the microphone with care to prevent damage to the grille and internal components. Always ensure the microphone is turned off before storing to preserve battery life.

Accessories for the Cochlear Mini Mic 2
The Cochlear Mini Mic 2 comes with a range of accessories, including lanyards, clips, and audio cables, to enhance portability and connectivity options for users.
9.1 Compatible Lanyards and Clips
The Cochlear Mini Mic 2 is complemented by compatible lanyards and clips, designed for convenient and secure wear. These accessories allow users to carry the microphone hands-free, ensuring easy access in various settings like classrooms or meetings. The lanyards and clips are durable, lightweight, and easily detachable, offering flexibility for different preferences and situations. They are available through Cochlear’s official distributors and support channels.
9.2 Additional Audio Cables and Adapters
The Cochlear Mini Mic 2 supports various audio cables and adapters for enhanced connectivity. These accessories enable seamless integration with sound processors, ensuring high-quality audio streaming. Auxiliary cables and USB adapters are available, offering flexibility for different devices. They are designed for durability and ease of use, providing reliable connections. These accessories can be purchased through authorized Cochlear distributors or online support channels.
The Cochlear Mini Mic 2 Manual is a comprehensive guide, detailing key features like wireless connectivity, long battery life, and compact design, ensuring optimal use, troubleshooting, and maintenance.
10.1 Summary of Key Features and Benefits
The Cochlear Mini Mic 2 offers wireless connectivity, long battery life, and a compact design, enhancing audio clarity in various settings. Its automatic pairing simplifies use, while the LED indicators provide status updates. Durable and portable, it ensures consistent performance, making it ideal for both everyday and challenging listening environments, as detailed in the manual.
10.2 Final Tips for Optimal Use
To maximize the performance of your Cochlear Mini Mic 2, always ensure it is fully charged before use. Regularly clean the microphone with a soft cloth and avoid exposing it to harsh environments. Store the device in a protective case when not in use and keep it away from moisture. For the best experience, pair it with compatible accessories and refer to the manual for troubleshooting any issues that arise. This will ensure long-lasting functionality and clear audio quality.

Where to Find the Cochlear Mini Mic 2 Manual PDF
The Cochlear Mini Mic 2 Manual PDF is available on the official Cochlear website and through authorized distributors. Visit their support section for easy access.
11.1 Official Cochlear Website Resources
The official Cochlear website offers a dedicated section for manuals, including the Mini Mic 2 PDF. Users can navigate to the “Support” tab, select their product, and download the manual directly. This ensures access to the most up-to-date and accurate information, provided by Cochlear Limited. Additionally, the site features quick guides and troubleshooting tips for enhanced user experience.
11.2 Authorized Distributors and Support Channels
Authorized distributors and Cochlear support channels provide reliable access to the Mini Mic 2 manual. Visit the official Cochlear website for a list of verified distributors. Additionally, contact Cochlear’s customer support for assistance with manual downloads or troubleshooting. Local distributors often offer printed copies or digital versions, ensuring easy accessibility for all users. This network guarantees authentic and updated resources.