
Graco 4-in-1 Crib Instructions: A Comprehensive Guide
This guide details Graco 4-in-1 convertible crib assembly‚ conversion stages‚ safety‚ and maintenance – essential for proper use throughout your child’s growth.
Overview of the Graco 4-in-1 Convertible Crib
The Graco 4-in-1 Convertible Crib stands as a remarkably versatile and practical sleeping solution‚ designed to accompany your child’s development from infancy through to adulthood. Its core strength lies in its adaptability‚ seamlessly transitioning through four distinct configurations: a traditional crib‚ a toddler bed‚ a convenient daybed‚ and ultimately‚ a full-size bed.
This adaptability not only provides exceptional value but also eliminates the need for purchasing multiple pieces of furniture as your child grows. The crib’s durable construction ensures longevity‚ while the thoughtfully engineered design prioritizes both safety and ease of assembly. It’s a popular choice for parents seeking a long-term‚ reliable‚ and cost-effective sleep solution.
Understanding the 4 Configurations
The Graco 4-in-1 crib’s adaptability centers around its four distinct modes. Initially‚ it functions as a standard infant crib‚ providing a secure and cozy sleep space for newborns and young babies. As your child grows‚ it converts into a toddler bed‚ utilizing a separate toddler guardrail for added safety during the transition.
Further adapting to changing needs‚ the crib transforms into a daybed‚ removing the need for side rails and creating a comfortable lounge space. Finally‚ it converts to a full-size bed‚ accommodating older children and even teenagers with the addition of a full-size mattress and frame – extending the furniture’s lifespan significantly.
Safety Precautions Before Assembly
Prior to Graco 4-in-1 crib assembly‚ ensure a spacious‚ clean‚ and level work area‚ free from potential hazards. Carefully inspect all parts against the parts list‚ noting any missing or damaged components. Assembly should ideally be performed by two adults to prevent errors and ensure stability.
Always refer to the manufacturer’s manual for model-specific instructions. Tighten all hardware securely‚ but avoid over-tightening‚ which could damage the wood. Keep small parts and packaging away from children to prevent choking hazards. Regularly check for loose screws and bolts after assembly and throughout the crib’s use.

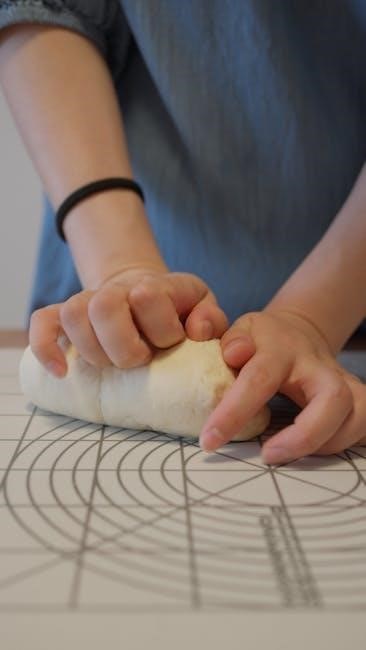
Assembly Instructions: Step-by-Step
Follow the manual’s detailed steps for safe and efficient Graco 4-in-1 crib assembly‚ gathering all tools and hardware beforehand for a smooth process.
Unboxing and Parts Identification
Carefully unpack all components of your Graco 4-in-1 convertible crib‚ checking against the parts list included in the assembly manual to ensure everything is present.
Typically‚ you’ll find side rails‚ a headboard‚ a footboard‚ a mattress support system‚ and various hardware like screws‚ bolts‚ and Allen wrenches.
Lay out all parts on a protected surface to prevent scratches and facilitate easy identification. Refer to the diagrams in the manual to correctly identify each piece before beginning assembly.
Missing parts should be reported to Graco customer support immediately; do not attempt to substitute hardware‚ as this could compromise the crib’s structural integrity and safety.
Proper identification is crucial for a successful and safe assembly process‚ setting the foundation for a secure sleeping environment for your child.
Assembling the Crib Frame
Begin by attaching the side rails to the headboard and footboard using the provided bolts and Allen wrench‚ ensuring a snug but not overly tightened fit initially.
Follow the assembly manual’s diagrams closely‚ paying attention to the orientation of each piece – incorrect placement can hinder the process and compromise stability.
Once the four sides are connected‚ gently square the frame‚ verifying that all corners are aligned before fully tightening the bolts.
Double-check all connections for security‚ ensuring no gaps or loose fittings exist. A stable frame is paramount for the crib’s overall safety and longevity.
Avoid over-tightening‚ which can strip the screw holes or damage the wood; a firm‚ secure connection is sufficient.
Attaching the Mattress Support
Locate the mattress support hooks or brackets within the crib frame; these will determine the mattress height settings as your child grows.
Insert the support platform into the designated slots‚ ensuring it sits level and securely on all sides – proper leveling is crucial for safe sleep.
Confirm the support is locked into place‚ utilizing any provided locking mechanisms or pins to prevent accidental dislodgement.
Adjust the height as needed‚ following the manufacturer’s guidelines for each developmental stage‚ remembering lower settings are safer for younger infants.
Always verify the mattress fits snugly within the frame‚ leaving no gaps where a baby could become trapped – a tight fit is a safety necessity.

Converting to Toddler Bed Mode
Transitioning to toddler mode requires specific parts and careful steps‚ ensuring a safe and secure sleeping arrangement for your growing child.
Required Parts for Toddler Bed Conversion
Converting your Graco 4-in-1 crib to a toddler bed necessitates specific components‚ often sold separately‚ to ensure a safe and functional transition. Typically‚ you’ll need a toddler guardrail‚ designed to prevent accidental falls during sleep. This guardrail securely attaches to the crib frame‚ replacing one of the full-size crib sides.
Additionally‚ a support leg or brace might be required‚ depending on the crib model‚ to provide extra stability once the front side is removed. Always consult your crib’s manual to confirm the exact parts needed for your specific model. Some conversion kits may include both the guardrail and support leg‚ offering a convenient all-in-one solution. Ensure all parts are genuine Graco replacements for optimal fit and safety.
Steps for Converting to Toddler Bed
Begin by carefully disassembling the crib to its lowest mattress height setting; Remove the full-size crib side‚ creating the open side characteristic of a toddler bed. Next‚ attach the toddler guardrail to the opposite side‚ ensuring it’s securely fastened according to the manufacturer’s instructions. If required‚ install the support leg or brace to reinforce the structure.
Double-check all connections‚ verifying that screws are tightened and the guardrail is stable. Once confirmed‚ place the mattress back inside‚ ensuring it fits snugly within the modified frame. Always refer to your Graco crib’s manual for model-specific guidance and safety precautions during this conversion process.
Safety Considerations for Toddler Bed Use
Transitioning to the toddler bed configuration necessitates heightened safety awareness. Always use a compatible toddler mattress designed for the reduced size and open-side structure. Ensure the guardrail is securely attached and regularly inspected for stability‚ preventing accidental falls. Position the toddler bed away from windows‚ cords‚ and other potential hazards.
Supervise your child closely during the initial adjustment period. Consider using a soft rug or playmat around the bed to cushion potential falls. Regularly check all hardware‚ tightening screws as needed. Prioritize a safe sleep environment‚ adhering to recommended guidelines for bedding and room temperature.

Converting to Daybed Mode
Daybed conversion involves removing the crib’s front panel‚ creating an open side; ensure stability before use‚ providing a comfortable lounging and sleeping space.
Daybed Conversion Process
Transitioning your Graco 4-in-1 crib to daybed mode is a straightforward process‚ designed for growing toddlers. Begin by carefully disassembling one of the longer side rails of the crib – typically the front panel. This rail is usually secured with bolts‚ which you’ll need to remove using the appropriate Allen wrench (often included with the original crib assembly).
Once the rail is detached‚ you can reposition the mattress support to its lowest setting. This ensures a safer height for your child as they transition to a daybed. The removed side rail should be stored safely for future use when converting back to a crib or for other configurations. Double-check all remaining connections to confirm the daybed structure is secure and stable before allowing your child to use it.
Ensuring Daybed Stability
Daybed stability is paramount for your child’s safety. After converting‚ thoroughly inspect the Graco 4-in-1 crib to ensure all remaining connections are tightly secured. Gently rock the daybed frame to check for any wobbling or looseness; retighten bolts as needed.
Position the daybed against a wall to provide additional support and prevent accidental tipping. Regularly check the hardware – screws and bolts – for any signs of loosening over time‚ especially with active toddlers. Avoid placing the daybed near windows or anything your child could use to climb on‚ increasing the risk of falls. A stable daybed provides a safe and comfortable transition for your growing child.

Converting to Full-Size Bed Mode
Transitioning to a full-size bed extends the Graco crib’s life‚ offering a familiar sleep space for older children and even teenagers.
Parts Needed for Full-Size Bed Conversion

Successfully converting your Graco 4-in-1 convertible crib into a full-size bed requires specific components‚ often sold separately‚ to ensure structural integrity and safety. Typically‚ you’ll need a full-size bed rail kit‚ which includes two side rails to provide support and prevent accidental roll-offs.
A full-size headboard and footboard are also essential‚ designed to attach to the existing crib frame. These pieces often match the style of the original crib‚ maintaining a cohesive look. Additionally‚ you’ll require a box spring and a full-size mattress‚ conforming to standard dimensions for a comfortable sleep surface.
Finally‚ ensure you have the necessary hardware – bolts‚ screws‚ and washers – included with the conversion kit to securely fasten all components. Always consult your crib’s manual for a precise parts list specific to your model.
Full-Size Bed Assembly Instructions
Begin by carefully attaching the headboard and footboard to the existing crib frame‚ utilizing the provided bolts and washers‚ ensuring a snug and secure fit. Next‚ install the full-size bed rails onto the sides of the frame‚ again verifying a tight connection for stability.
Once the frame is complete‚ position the box spring within the rails‚ ensuring it sits flush against the headboard and footboard. Carefully place the full-size mattress on top of the box spring‚ confirming it’s properly aligned and supported.
Double-check all connections‚ tightening any loose bolts or screws. Refer to your crib’s manual for specific diagrams and torque specifications. Prioritize safety by ensuring all components are firmly attached before use.
Weight Capacity and Support
The Graco 4-in-1 convertible crib‚ when configured as a full-size bed‚ is designed to support a significant amount of weight‚ typically around 500 pounds. However‚ always consult your specific model’s manual for precise limitations.
Ensure the center support rail is correctly installed and adequately braced to prevent sagging or instability. Regularly inspect the bed frame‚ rails‚ and mattress support to identify any signs of wear or damage.
Using a quality mattress and box spring combination is crucial for optimal support and comfort. Distribute weight evenly across the bed surface to maximize longevity and maintain structural integrity. Prioritize safety by adhering to the weight capacity guidelines.

Maintenance and Care
Regular cleaning‚ hardware checks‚ and timely part replacements are vital for maintaining the Graco crib’s safety and longevity throughout its various configurations;
Cleaning the Crib
Maintaining a clean Graco 4-in-1 crib is crucial for your child’s health and hygiene. Regularly wipe down all surfaces – the frame‚ mattress support‚ and any converted components – with a mild soap and water solution. Avoid abrasive cleaners‚ as these can damage the finish.
For tougher stains or spills‚ a diluted baby-safe cleaning product can be used‚ but always ensure it’s thoroughly rinsed and dried before allowing your child to use the crib. Pay special attention to areas where your baby spends the most time‚ like the mattress support area.
Periodically check for and remove any dust or debris that may accumulate in corners or crevices. Remember to always follow the manufacturer’s specific cleaning recommendations found in the crib’s instruction manual for optimal care.
Regular Hardware Checks
Consistent hardware checks are paramount for ensuring the continued safety and stability of your Graco 4-in-1 convertible crib. At least monthly‚ and especially after any configuration changes‚ meticulously inspect all bolts‚ screws‚ and other fasteners.
Tighten any loose hardware immediately. Do not overtighten‚ as this could strip the threads or damage the wood. Pay close attention to connections between the frame pieces‚ the mattress support‚ and any conversion kits used for toddler‚ daybed‚ or full-size modes.
Regular inspections will help identify potential issues before they become safety hazards‚ maintaining a secure sleep environment for your child throughout all stages of the crib’s use.
Replacing Parts
If any part of your Graco 4-in-1 convertible crib becomes damaged or missing‚ it’s crucial to replace it immediately to maintain safety. Graco offers replacement parts through their customer service channels and authorized retailers.
Never attempt to fabricate or substitute parts with non-Graco components‚ as this could compromise the crib’s structural integrity and safety standards. When ordering replacements‚ have your crib’s model number and date of manufacture readily available.
Always follow the assembly instructions carefully when installing new parts‚ ensuring they are securely fastened and properly aligned. Prioritize genuine Graco parts for optimal performance and continued safety.

Troubleshooting Common Issues
Addressing squeaks or missing parts is common; carefully re-examine assembly‚ tighten hardware‚ and contact Graco for replacements if needed.
Addressing Squeaking Sounds

Squeaking sounds during movement are often a common concern with newly assembled Graco 4-in-1 cribs‚ and usually indicate loose connections. Begin by systematically checking all bolts‚ screws‚ and other hardware components‚ ensuring each is firmly tightened. Pay close attention to areas where the side rails connect to the headboard and footboard‚ as these are frequent sources of noise.
If tightening doesn’t resolve the issue‚ a small amount of lubricant‚ such as furniture polish or beeswax‚ can be applied to the joints. Avoid using oil-based lubricants‚ as these can damage the finish. Gently rock the crib to identify the precise source of the squeak‚ then apply the lubricant sparingly. Regularly inspect and tighten hardware as part of routine maintenance to prevent future squeaking and ensure continued stability.
Dealing with Missing Parts
Discovering missing parts during Graco 4-in-1 crib assembly can be frustrating‚ but is often easily resolved. First‚ carefully re-examine the packaging materials – smaller components are sometimes concealed within the cardboard or plastic wrapping. Next‚ consult the parts list included in the instruction manual to confirm exactly what is missing.
If a part is genuinely absent‚ contact Graco customer support immediately. Have your crib model number and purchase date readily available. Graco typically offers replacement parts free of charge‚ though shipping fees may apply. Avoid attempting to substitute parts with non-original components‚ as this could compromise the crib’s structural integrity and safety.