
Harley-Davidson Rear Wheel Assembly Diagram: A Comprehensive Guide
This detailed manual provides step-by-step instructions for Harley-Davidson rear wheel assembly, utilizing diagrams sourced from parts catalogs like lenmoto.ru and partsfor.ru.
Harley-Davidson rear wheel assemblies are critical components, demanding precise assembly for optimal performance and rider safety. This guide focuses on the intricacies of these systems, referencing parts diagrams from resources like lenmoto.ru and partsfor.ru, which showcase components for models such as the 2003 FLTR Road Glide and FLHRCI Road King.
Understanding the assembly process is vital, as incorrect installation can lead to wheel failure. The rear wheel isn’t simply a bolted-on component; it’s a carefully engineered system involving the hub, spokes, rim, bearings, seals, and brake components. Diagrams illustrate variations across models (FLTR, FLHTCUI, FLHRCI), highlighting the importance of using the correct parts. This manual aims to demystify the process, providing clear instructions for both seasoned mechanics and DIY enthusiasts, ensuring a secure and reliable rear wheel assembly.
Understanding Harley-Davidson Model Variations
Harley-Davidson rear wheel assemblies exhibit notable variations across different models and years. Resources like lenmoto.ru and partsfor.ru demonstrate these differences, showcasing parts specific to the 2003 FLTR Road Glide, FLHRCI Road King, and FLHTCUI Ultra Classic. These variations impact component compatibility and assembly procedures.
For instance, wheel dimensions, spoke patterns, and brake rotor mounting configurations can differ significantly. The diagrams reveal unique part numbers for each model, emphasizing the need to consult the correct documentation. Ignoring these variations can lead to improper fitment and compromised safety. This guide acknowledges these distinctions, providing tailored instructions where necessary. Always verify compatibility based on your specific Harley-Davidson model year and designation (e.g., FLTR 1FPV, FLHTCUI 1FCW) before commencing assembly, ensuring a correct and secure outcome.
Tools Required for Rear Wheel Assembly
Successful Harley-Davidson rear wheel assembly demands a specific set of tools. Essential items include a torque wrench, crucial for achieving accurate tightening of axle nuts and caliper bolts – preventing damage or failure. Socket sets, encompassing various sizes, are needed for hub and brake component installation. A spoke wrench is vital for tensioning and adjusting spokes, ensuring wheel trueness.
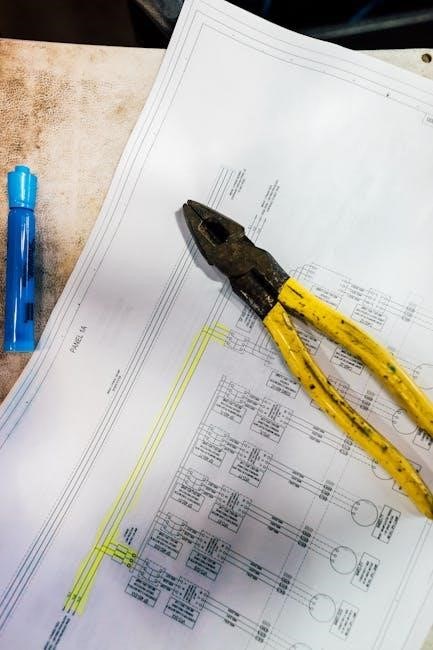
Furthermore, bearing presses or drifts facilitate safe bearing installation and removal. Tire irons are necessary for mounting and dismounting tires, while a wheel balancing stand ensures smooth operation. Specialized tools like a caliper piston compression tool may be required for brake service. Access to detailed parts diagrams, like those found on lenmoto.ru and partsfor.ru, aids in identifying correct tool sizes and applications. Having these tools prepared beforehand streamlines the assembly process and minimizes potential complications.
Safety Precautions During Assembly
Prioritizing safety is paramount during Harley-Davidson rear wheel assembly. Always disconnect the motorcycle’s battery to prevent accidental electrical activation. Wear safety glasses to protect your eyes from debris, and gloves to shield your hands. Support the motorcycle securely on a lift or stand, ensuring stability throughout the process.

When working with brake components, be mindful of brake fluid, which can damage paint and irritate skin. Properly dispose of used fluids according to local regulations. Exercise caution when handling heavy wheel assemblies to avoid strain or injury. Referencing parts diagrams from resources like lenmoto.ru and partsfor.ru can help prevent incorrect installation, which could compromise safety. Double-check all torque specifications and ensure all fasteners are properly secured before operating the motorcycle.

Component Identification: A Detailed Breakdown
A successful assembly hinges on accurate component identification. The rear wheel system comprises several key elements, including the hub assembly, spokes and nipples, the rim itself, and essential bearings, seals, and spacers. The brake rotor and caliper mounting hardware are also critical. Online parts catalogs, such as those found on lenmoto.ru and partsfor.ru, provide detailed diagrams illustrating each component’s location and part number.

Understanding the specific variations for models like the 2003 FLTR Road Glide is crucial. Identifying the correct rim specifications – size, material, and spoke pattern – is vital. Pay close attention to bearing types and seal configurations. Correctly identifying these components, as shown in available diagrams, ensures a proper and safe wheel assembly.
Hub Assembly Components
The hub assembly forms the central core of the rear wheel. Key components include the hub itself, typically constructed from aluminum or cast iron, and the integrated bearing races. These races house the wheel bearings, facilitating smooth rotation. Seals are critical for preventing contamination and retaining lubricant within the bearing assembly. Spacers maintain correct bearing preload and alignment.
Referencing parts diagrams from resources like lenmoto.ru and partsfor.ru reveals the precise arrangement of these components. Variations exist between Harley-Davidson models – for example, the FLTR Road Glide (2003) will have specific hub components. Ensuring correct spacer placement and seal orientation is paramount for proper wheel function and longevity. Careful inspection of each component for damage is also essential before assembly.
Spokes and Nipples
Spokes are the tensile members connecting the hub to the rim, crucial for wheel strength and rigidity. They are typically stainless steel, resisting corrosion. Nipples, threaded fasteners, adjust spoke tension, enabling wheel truing. Correct spoke tension is vital; too loose leads to wheel wobble, while too tight risks spoke failure or rim distortion.
Diagrams from parts suppliers like lenmoto.ru and partsfor.ru illustrate spoke patterns and nipple locations. Harley-Davidson utilizes various spoke counts depending on the model and wheel size. Proper spoking involves a specific lacing pattern, alternating sides to distribute load evenly. Using a spoke wrench, nipples are incrementally adjusted to achieve a true and balanced wheel. Consistent tension across all spokes is paramount for safe operation.
Rim Identification and Specifications
Harley-Davidson rims vary significantly based on model year, style, and intended use. Identifying the correct rim is crucial for a successful assembly. Resources like partsfor.ru and lenmoto.ru showcase various rim designs, often categorized by part number and motorcycle model (e.g., FLTR, FLHTCUI, FLHRCI). Rim specifications include diameter, width, and material – typically aluminum or steel.
Understanding these specs ensures compatibility with tires, tubes (if applicable), and brake rotors. Rim profiles differ; some are flat, while others have contours. Diagrams detail rim construction, highlighting features like drop centers for easy tire mounting. Correct rim selection impacts handling and overall wheel performance. Always verify the rim’s load rating to match the motorcycle’s weight capacity.
Bearings, Seals, and Spacers
Proper bearing, seal, and spacer installation is vital for smooth wheel rotation and longevity. Harley-Davidson rear wheel assemblies utilize tapered roller bearings, requiring precise fit and lubrication. Seals protect bearings from contaminants, while spacers maintain correct wheel alignment within the hub. Parts diagrams from sources like lenmoto.ru and partsfor.ru illustrate the arrangement of these components.
Bearing preload adjustment is critical; too loose, and the wheel will have play, too tight, and it will bind. Spacers come in various widths, specific to each model. Always replace seals when disassembling the wheel. Inspect bearings for wear or damage before re-installation. Correct component placement, as shown in exploded views, prevents premature failure and ensures safe operation.
Brake Rotor and Caliper Mounting
Securely mounting the brake rotor and caliper is paramount for stopping power and rider safety. Harley-Davidson rear wheel diagrams, available on sites like partsfor;ru, detail the correct rotor orientation and mounting hardware. Ensure the rotor is clean and free of debris before installation. Calipers slide onto designated mounting brackets, requiring proper alignment and torque specifications.
Pay close attention to brake pad positioning relative to the rotor. Caliper mounting bolts must be tightened to the manufacturer’s specified torque to prevent loosening during operation. Inspect brake lines for damage and ensure proper routing. Verify free caliper movement after installation. Incorrect mounting can lead to reduced braking performance or even brake failure, so precision is key.
Step-by-Step Rear Wheel Assembly Process
Begin by preparing the hub assembly, meticulously inspecting all components for wear or damage. Referencing Harley-Davidson parts diagrams – found on resources like lenmoto.ru – is crucial. Next, install bearings and seals, ensuring proper lubrication and seating. Spoking the wheel demands patience and precision; maintain even tension across all spokes. Truing and balancing are vital for smooth operation, eliminating wobble and vibration.
Once trued, mount the tire and tube (if applicable), following recommended tire mounting procedures. Double-check bead seating before inflating. Throughout the process, consult detailed diagrams for correct component placement and torque values. A systematic approach, guided by visual aids, minimizes errors and ensures a safe, reliable rear wheel assembly.
Preparing the Hub Assembly

Initial preparation involves a thorough inspection of the Harley-Davidson hub assembly, referencing parts diagrams from sources like lenmoto.ru and partsfor.ru for accurate component identification. Clean all surfaces meticulously, removing any old grease, dirt, or corrosion. Carefully examine the hub flange for damage – cracks or warping necessitate replacement. Inspect the bearing races within the hub for pitting or wear; these should be smooth and consistent.
Verify the presence and condition of any retaining rings or clips. Ensure the axle bore is clean and free of obstructions. This meticulous preparation stage is fundamental to a successful wheel assembly, preventing premature failure and ensuring optimal performance. Proper cleaning and inspection, guided by detailed diagrams, are paramount.
Installing Bearings and Seals
Bearing installation requires precision and the correct tools. Utilizing parts diagrams from resources like lenmoto.ru and partsfor.ru, identify the correct bearing and seal types for your Harley-Davidson model. Gently press the bearings into the hub assembly, ensuring they seat fully and squarely – avoid hammering directly on the bearing cage. A bearing press is highly recommended.
Next, install the seals, again using a press to avoid damage. The seal lip should face inward, retaining grease within the hub. Verify proper seal seating and absence of gaps. Lubricate the bearings and seals with high-quality motorcycle grease before proceeding. Incorrect bearing installation can lead to wheel wobble and premature failure, so meticulous attention to detail is crucial.
Spoking the Wheel: A Detailed Guide
Spoking a wheel demands patience and accuracy. Referencing parts diagrams from sources like lenmoto.ru and partsfor.ru, begin by inserting spokes, alternating sides to evenly distribute tension. Ensure each spoke is correctly seated in both the hub and the rim. Initial spoke tension should be light and uniform.
Progressively tighten spokes in a star pattern – skipping spokes – to avoid warping the rim. Regularly check for rim runout as you tighten. Use a spoke wrench of the correct size to prevent damage to the nipples. Achieving even tension is vital for wheel strength and trueness. A spoke torque wrench is recommended for precise tightening. Improper spoking can result in wheel instability and safety hazards.
Truing and Balancing the Wheel
After spoking, truing ensures the wheel spins without wobble. Utilize a dial indicator to measure rim runout, adjusting spoke tension as needed – tighter on the high side, looser on the low. Maintain consistent tension throughout the process, referencing parts diagrams from resources like lenmoto.ru and partsfor.ru for correct spoke patterns.
Balancing prevents vibration during riding. Static balancing involves finding the heavy spot and positioning the valve stem opposite it. Dynamic balancing, using a specialized machine, is more precise. A properly trued and balanced wheel enhances handling, tire life, and rider comfort. Regularly inspect spoke tension, as it can change over time, impacting wheel performance and safety.
Mounting the Tire and Tube (if applicable)
Carefully mount the tire onto the wheel, ensuring the tube (if used) isn’t pinched between the rim and tire bead. Lubricate the tire beads with tire mounting lubricant for easier installation, referencing parts diagrams from sites like lenmoto.ru and partsfor.ru for correct tire sizing. Use tire irons cautiously to avoid damaging the tire or rim.
Once the tire is seated, inflate the tube gradually, checking the bead for proper seating around the entire circumference. Avoid overinflation. For tubeless tires, use a valve core tool to ensure the valve core is tight. Inspect for any leaks and address them immediately. Proper tire mounting is crucial for safety and optimal handling, as detailed in Harley-Davidson service manuals.
Brake System Integration
Integrating the brake system requires precision and adherence to torque specifications. Begin by carefully installing the brake rotor, ensuring it’s properly aligned with the caliper mounting points – referencing parts diagrams from resources like lenmoto.ru and partsfor.ru is vital. Mount the caliper, applying anti-seize to the mounting bolts before tightening to the specified torque.
Next, install new brake pads, ensuring they are correctly seated within the caliper. Bleed the brake line to remove any air bubbles, guaranteeing firm brake lever feel. Double-check all connections for leaks. Proper brake system integration is paramount for safe operation, and consulting Harley-Davidson’s official documentation is highly recommended.
Installing the Brake Rotor
Proper brake rotor installation is crucial for optimal braking performance and safety. Begin by thoroughly cleaning the hub mounting surface to remove any debris or corrosion. Carefully position the brake rotor onto the hub, ensuring it’s centered and flush against the mounting surface. Utilize the appropriate fasteners, often sourced from parts catalogs like lenmoto.ru and partsfor.ru, and apply a thread-locking compound to prevent loosening.
Torque the rotor bolts to the manufacturer’s specified value, using a calibrated torque wrench. Avoid over-tightening, which can warp the rotor. Verify the rotor spins freely without binding. Inspect for any signs of damage or runout. A correctly installed rotor is fundamental to a functioning brake system.
Caliper Mounting and Alignment
Securely mounting and aligning the brake caliper is paramount for consistent and effective braking. Begin by applying a thin layer of brake caliper grease to the mounting surfaces of both the caliper and the motorcycle frame. Carefully position the caliper over the mounting bolts, ensuring proper orientation according to parts diagrams found on sites like lenmoto.ru and partsfor.ru.
Install the mounting bolts and torque them to the manufacturer’s specifications using a calibrated torque wrench. Improper torque can lead to caliper movement or damage. After mounting, verify proper alignment with the brake rotor. The caliper should center over the rotor, allowing for even pad contact. Misalignment can cause uneven wear and reduced braking efficiency.
Brake Pad Installation

Proper brake pad installation is crucial for optimal stopping power and safety. Before installing new pads, thoroughly clean the caliper and piston area, removing any debris or corrosion. Carefully retract the caliper piston using a suitable tool – avoid damaging the piston surface. Apply a thin layer of brake caliper grease to the shims and backing plates of the new brake pads, as referenced in parts diagrams from resources like lenmoto.ru and partsfor.ru.
Insert the brake pads into the caliper, ensuring they are seated correctly and move freely. Secure them with any retaining clips or pins provided. Double-check that the pads align properly with the rotor surface. Incorrect installation can lead to premature wear, noise, and reduced braking performance. Always consult the Harley-Davidson service manual for specific pad installation procedures.

Final Assembly and Torque Specifications
Completing the rear wheel assembly requires meticulous attention to torque specifications. Begin by carefully installing the axle, ensuring it slides smoothly through the wheel bearings and caliper. Refer to the Harley-Davidson service manual – or parts diagrams from sources like lenmoto.ru and partsfor.ru – for the correct axle torque value for your specific model.
Next, tighten the axle nut to the specified torque using a calibrated torque wrench. Improper torque can lead to wheel instability or bearing damage. Adjust the wheel bearings to eliminate play while maintaining smooth rotation. Finally, verify proper wheel alignment; misalignment can cause tire wear and handling issues. A final check of all fasteners is essential before road testing.
Axle Installation and Torque Values
Proper axle installation is critical for rear wheel safety and performance; Begin by applying a light coating of grease to the axle splines to facilitate smooth insertion. Carefully slide the axle through the wheel hub, ensuring it passes cleanly through the bearings on both sides. Align the axle with the mounting holes in the swingarm.
Consult your Harley-Davidson service manual – referencing parts diagrams from resources like lenmoto.ru and partsfor.ru for model-specific data – to determine the correct axle nut torque value. Use a calibrated torque wrench to tighten the axle nut to the specified torque. Overtightening can damage the axle or bearings, while undertightening poses a serious safety risk. Double-check the torque value before proceeding.
Adjusting Wheel Bearings
Correct wheel bearing adjustment is paramount for smooth rolling and longevity. After axle installation, check for bearing play. With the wheel mounted and the motorcycle supported, attempt to rock the wheel laterally. Any noticeable play indicates the bearings are too loose. Refer to your Harley-Davidson service manual – utilizing parts diagrams from sources like lenmoto.ru and partsfor.ru – for precise adjustment procedures.
Typically, adjustment involves tightening the axle nut to a specific torque, then loosening the nut slightly while rotating the wheel to seat the bearings. Retorque the nut to the final specified value. Ensure both bearings are adjusted equally. Over-tightening restricts bearing movement and causes premature wear, while looseness leads to instability. Verify proper adjustment again before riding.
Checking for Proper Wheel Alignment
Accurate wheel alignment is crucial for stable handling and tire wear. After final assembly, verify alignment using a straightedge or laser alignment tool. Position the tool along the tire’s circumference, checking against a reference point on the swingarm or frame. Misalignment, even slight, can cause pulling, uneven tire wear, and reduced braking performance. Refer to your Harley-Davidson service manual, supplementing with parts diagrams from resources like lenmoto.ru and partsfor.ru, for specific alignment tolerances;
Adjust alignment by loosening the axle nut and gently nudging the wheel into the correct position. Retorque the axle nut to the specified value after alignment is confirmed. Re-check alignment after a short test ride, as components can settle. Consistent monitoring ensures optimal performance.
Troubleshooting Common Rear Wheel Assembly Issues
Several issues can arise during rear wheel assembly. Wobbling often indicates improperly tensioned spokes or a bent rim – consult parts diagrams from sites like lenmoto.ru and partsfor.ru to identify correct components. Excessive bearing play suggests incorrect bearing preload or worn bearings; ensure proper spacer placement. Difficulty mounting the tire may stem from an incorrectly sized tire or a damaged rim. Always double-check part numbers against your Harley-Davidson’s service manual.
If experiencing brake rotor runout, verify proper caliper mounting and rotor flatness. A clicking sound could indicate loose spokes or a damaged hub. Remember to retorque all fasteners after addressing any issues, referencing specified torque values.
Resources for Harley-Davidson Parts Diagrams
Accessing accurate parts diagrams is crucial for successful rear wheel assembly. Websites like lenmoto.ru offer extensive exploded views, showcasing component relationships for models like the 2003 FLTR Road Glide. Partsfor.ru provides similar resources, detailing parts lists and visual representations – essential when referencing information from an instruction manual. These online catalogs often feature detailed images, aiding in component identification.

Harley-Davidson’s official service manuals are invaluable, providing OEM part numbers and specific assembly instructions. Online forums dedicated to Harley-Davidson maintenance can also offer user-submitted diagrams and troubleshooting advice. Remember to verify compatibility with your specific model year and configuration.